Hey there, it’s your go-to fellow for everything canine. Today, I’m super excited to share my recent adventures in setting up the newest invisible fence for dogs. I know the struggle of wanting to give your furry friend the freedom they love while keeping them safe, so I’m here to walk you through the process, step by step.
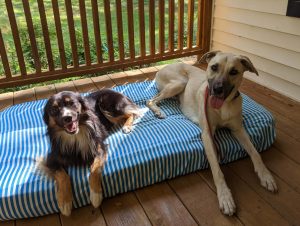
I am with Ben and Luna, a dynamic duo I recently had the pleasure of helping set up their invisible dog fence. Ben, a proud dog dad to the energetic Luna, was on the quest for a solution that would allow Luna to roam freely without the constraints of traditional fences. As Luna’s playful spirit eagerly awaited her newfound freedom, I dove headfirst into the world of invisible dog fences to guide Ben through the setup process.
Step 1: Planning Your Pet’s Area
The first and crucial step is to plan your pet’s paradise. Ben and I sat down with a cup of coffee to map out the boundaries for Luna’s play area. We considered factors like landscaping, potential hazards, and Luna’s favorite spots. This planning stage is where you customize the invisible fence to suit your yard and your dog’s needs. We marked the designated boundaries, ensuring there was enough space for Luna to run, play, and explore. It’s like creating a personalized playground tailored to your dog’s preferences.
Step 2: Choosing the Right System
Next up was choosing the right invisible fence system. There are various options on the market, and selecting the one that fits your dog’s size, temperament, and your yard’s layout is crucial. We opted for a system with adjustable settings, making it suitable for Luna’s spirited personality. Remember, it’s not a one-size-fits-all scenario. Consider factors like the exact size of your yard, the number of dogs, and any specific features that might enhance the overall experience for both you and your furry friend.
Step 3: Installing the Transmitter
With our plan in place and the system selected, it was time to install the transmitter. This nifty device is the brain behind the invisible fence, sending signals to the collar worn by your dog. We strategically placed it in a central location, ensuring a strong and consistent signal throughout Luna’s play area. The installation process was surprisingly simple; it was like setting up the heart of Luna’s invisible playground. Just plug it in, adjust the settings according to your plan, and you’re good to go.
Step 4: Laying the Boundary Wire
Now, this is where the magic happens. The boundary wire acts as an invisible barrier, creating the limits of your dog’s play area. Ben and I carefully buried the wire along the marked boundaries, ensuring it followed the contours of the yard. It’s like drawing an invisible line that only Luna can see.
Pro tip: Use a trenching tool or a lawn edger to make the process smoother. The goal is to create a seamless boundary that blends into your yard’s natural landscape.
Step 5: Fitting the Collar
Ah, the moment of truth! Luna’s invisible fence experience wouldn’t be complete without the stylish collar that comes with the system. We adjusted the collar to fit Luna comfortably, making sure it was snug but not too tight. The collar contains the receiver that picks up signals from the transmitter and emits a warning if Luna gets too close to the invisible boundary. Watching Luna sport her new accessory, it felt like she was gearing up for an adventure, and what an adventure it would be!
Step 6: Training and Positive Reinforcement
The invisible fence is not just a physical barrier; it’s a tool for training and positive reinforcement. Ben and Luna embarked on a training journey that involved gradually introducing Luna to the boundaries. We started with short, supervised sessions, allowing Luna to associate the warning signals with the invisible boundaries. Positive reinforcement, such as treats and praise, played a crucial role in Luna’s training. It’s like teaching your dog a secret language—one that ensures they understand the rules of their invisible playground.
Step 7: Supervised Playtime
As Luna became familiar with her new invisible boundaries, it was time for supervised playtime. Ben and I observed Luna as she explored her designated area, noting her reactions to the warning signals. It’s like being the director of Luna’s invisible adventure, ensuring she feels secure and confident within her newfound freedom. Remember, the initial supervised sessions are essential to reinforce the training and build your dog’s confidence in the invisible fence.
Step 8: Troubleshooting and Adjustments
No setup process is complete without a bit of troubleshooting. Ben and I kept a close eye on Luna’s reactions to the invisible fence and made adjustments as needed. Whether it was fine-tuning the collar settings or repositioning the boundary wire, we were determined to ensure Luna’s experience was seamless. Think of this step as the final touch to perfecting Luna’s invisible playground—a tweak here, a tweak there, until everything runs smoothly.
Freedom!! One Boundary at a Time
As Luna pranced around her invisible playground, it was clear that the invisible dog fence had transformed her world. Ben couldn’t have been happier, knowing Luna was experiencing the joy of freedom within the safety of their carefully planned boundaries. Setting up the newest invisible dog fence was a rewarding journey, a blend of planning, technology, and positive reinforcement that resulted in Luna’s newfound freedom. If you’re considering an invisible fence for your furry friend, remember to customise it to suit their needs, choose the right system, and embrace the training process as a bonding experience.
Here’s to creating invisible playgrounds that empower our dogs to explore, play, and thrive within the safety of our carefully crafted boundaries. Until next time, happy fencing, fellow pet lovers!
